A homebrew motorised X-Y stage.
I’m thinking about starting a new project that needs a sample to be moved around on a plane under computer control, I could just buy one, but where’s the fun in that?
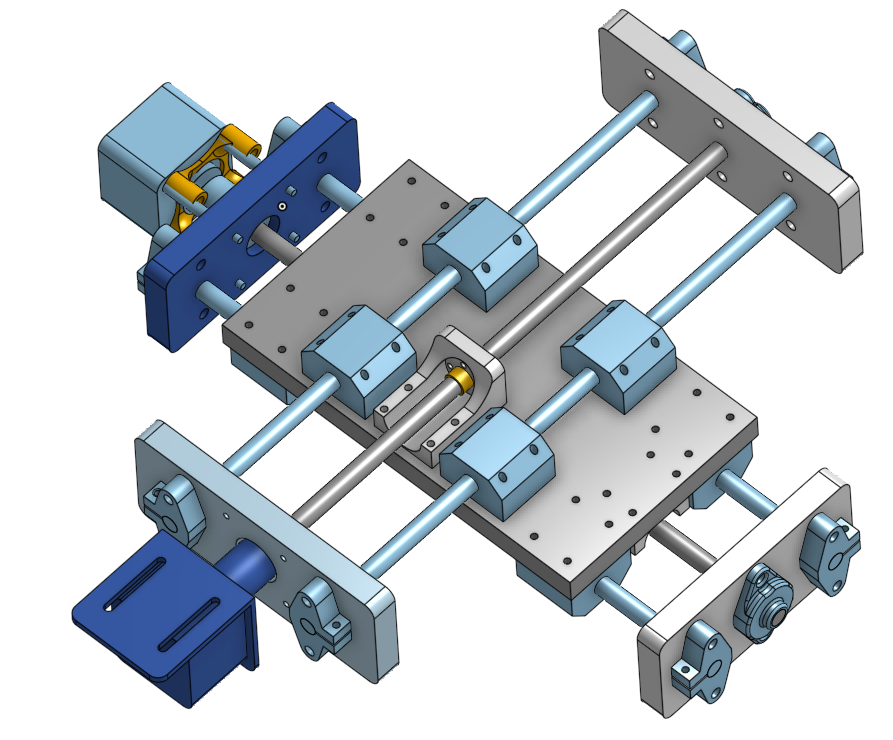
I started this project off by designing the parts in my favourite CAD program onshape. I haven’t fully decided what the x-y travel needs to be so it’s time for a prototype.
Here is a short video showing the model in onshape:
It’s not a perfect model as all parts are not “mated” correctly, but it was enough to get things going. The model also allowed me to create some custom parts for me to 3D print.
I’ve decided to make the connecting parts of the design from MDF as it’s easy to machine with hand-tools and very cheap so I will not feel bad when I iterate on the design. The down side of using MDF is that I can not tap it (for bolts) so that did effect the design. All parts need a nut and bolt to hold them on the plate in the middle, so the bearing pillow blocks need to be orthogonal to each other. Due to this the plate is larger than it needs to be which reduces travel (engineering is all about compromise).
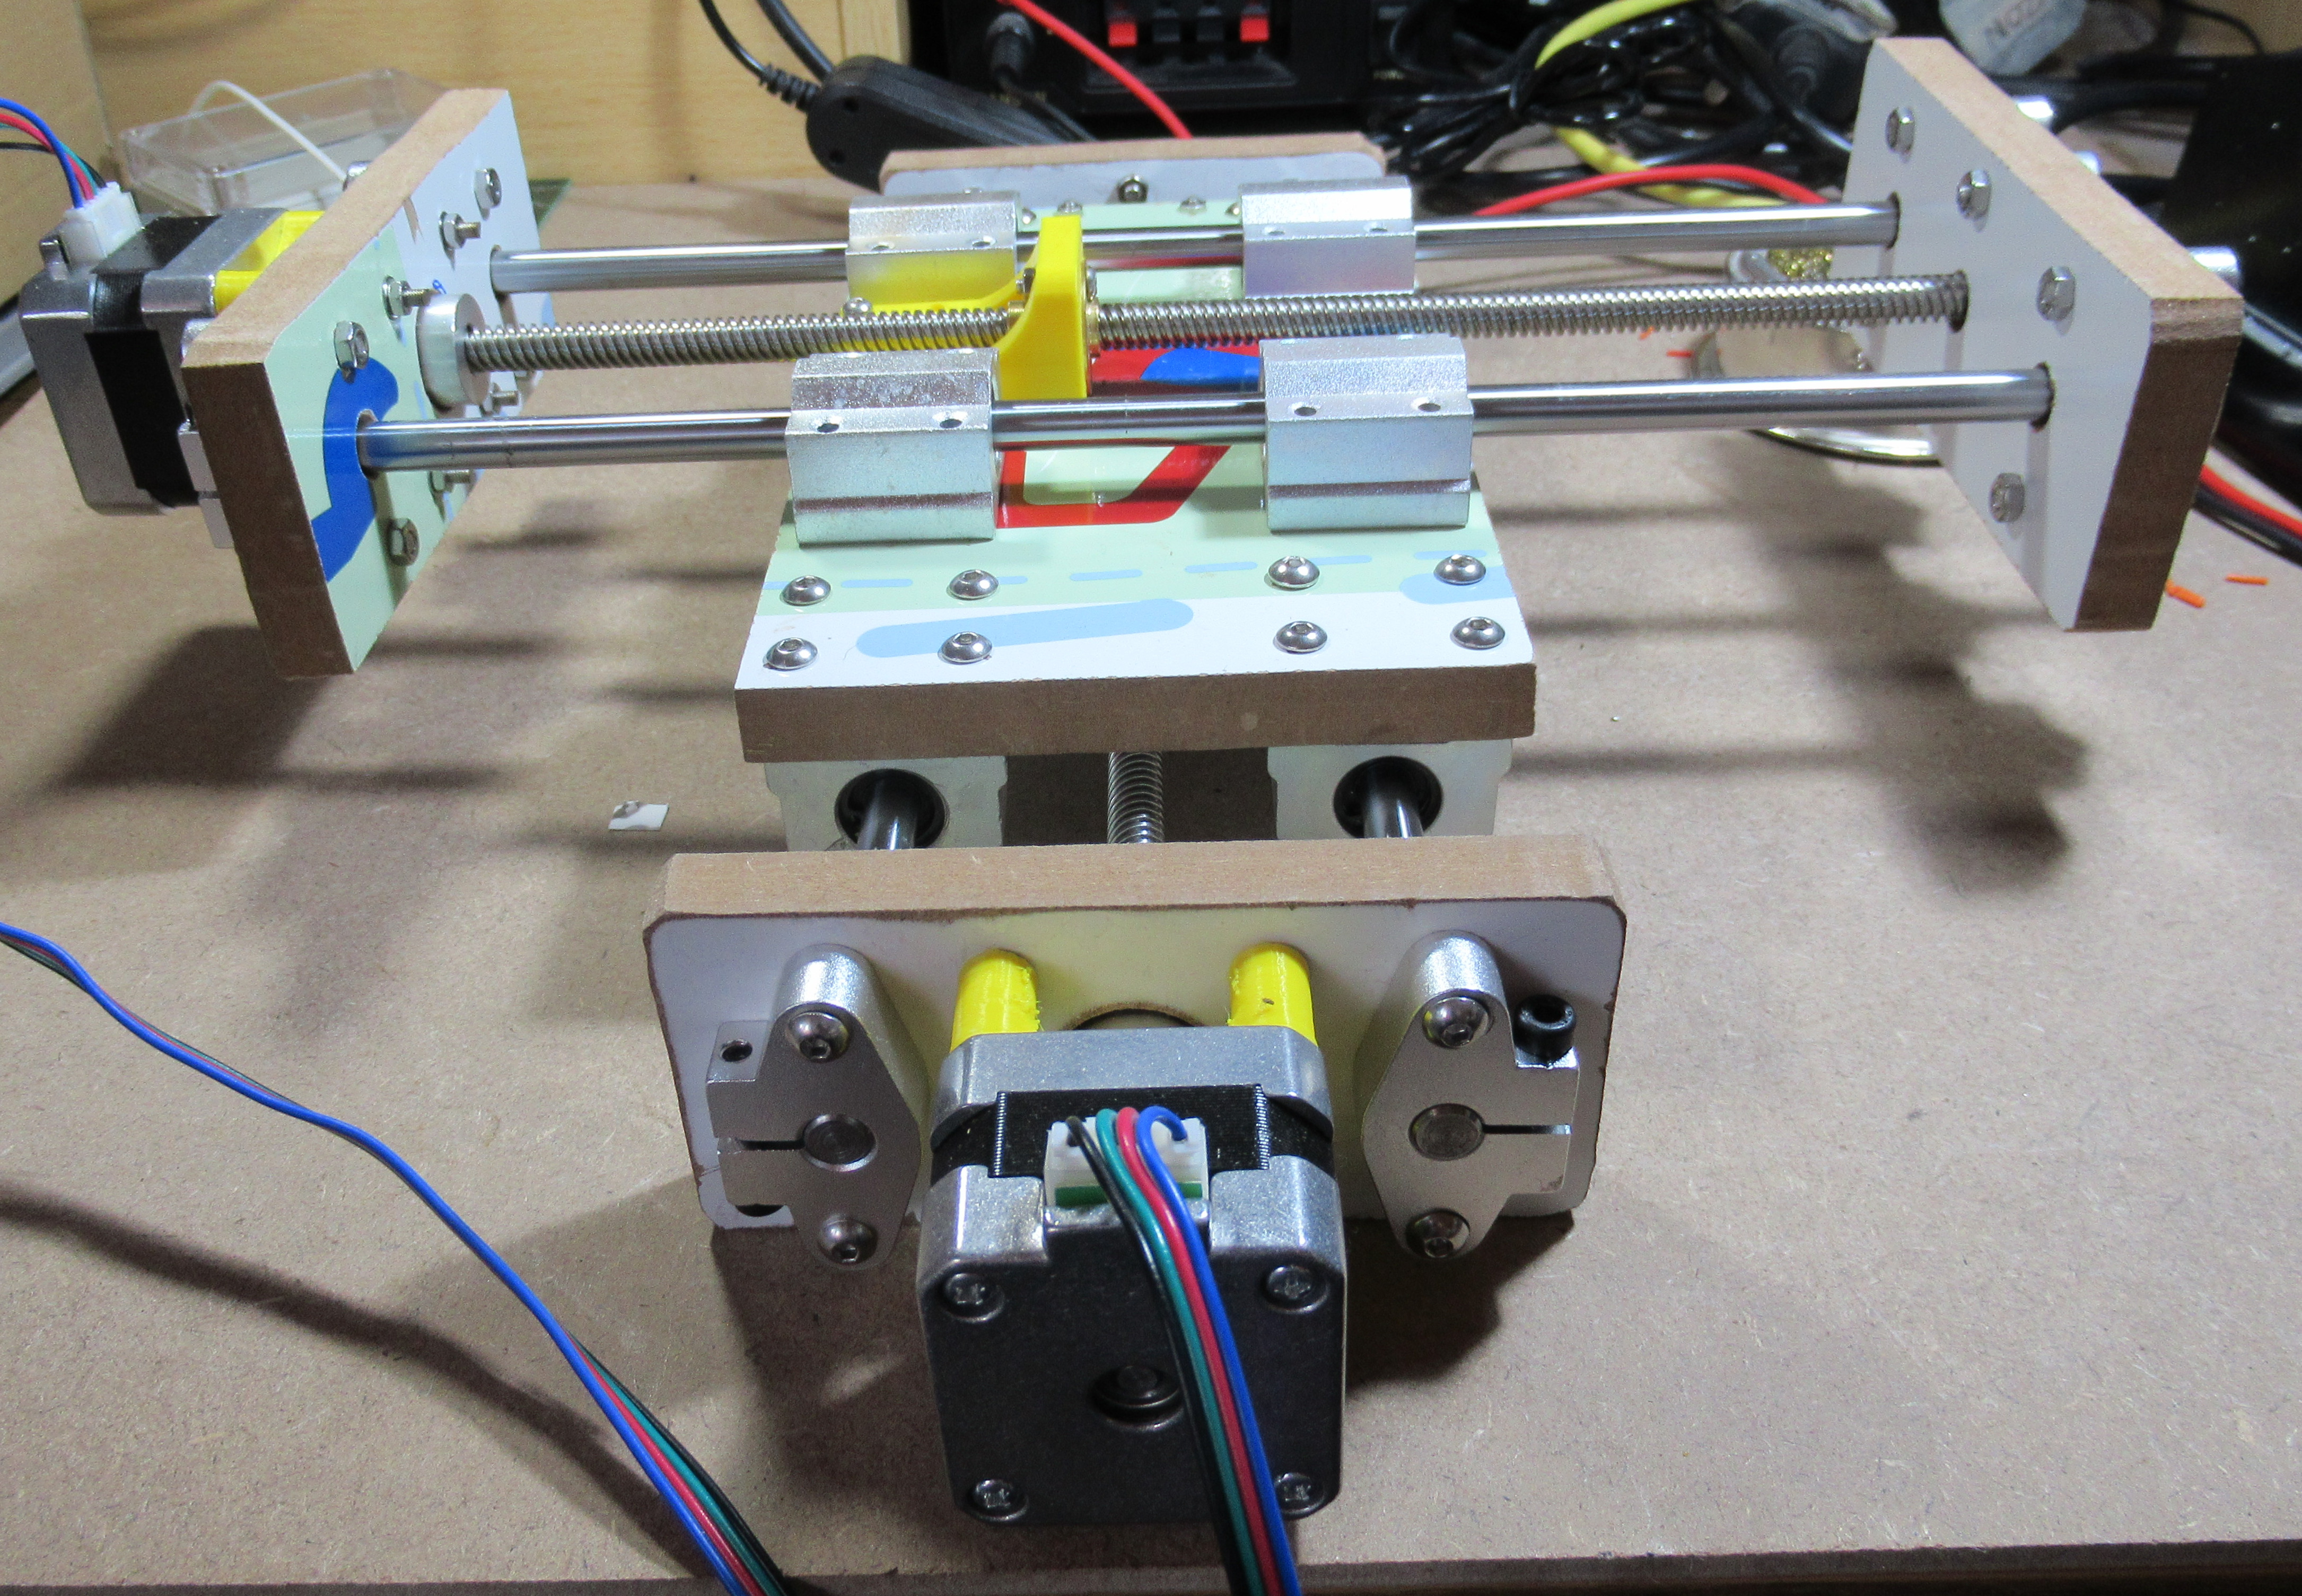
Here is a video of it running, moving in both axis, i’ve 3D printed the yellow parts on my AnetA8:
My new favourite microcontroller board for small projects is the bluepill, it’s really cheap and powerful (ARM Cortex-M3 inside).
The motor drivers i’m using are the Trinamic TMC2100 drivers, they are amazingly quiet and have become very popular in the 3D printing world.
The software for this project just reads two potentiometers on the joystick using an ADC and uses a timer to produce a “step” signal to the two motor driver boards, it’s simple, but a complete mess so I wont be putting it on github.
Here is a hi-red picture of the current setup: